 My family has an annual problem: too many gingerbread houses. Of course it’s a self-created problem, because every year we like to invite friends over for a sleepover party where we stay up playing with candy, eventually collapse into a sugar coma, then wake up and make a nice brunch before everyone heads out the next day. (Slideshow here)
To make this many gingerbread houses year after year without hating the process you really need a system. And a few good recipes. It took failed attempts year after year before we got this down but I think it’s pretty much foolproof now. The instructions below are written in much more detail than most of my recipes, but I figure it’s better to include the stuff I’ve learned by trial and error.
The system: think about the size of the houses so you don’t get tired of decorating them halfway through. Here’s one of my patterns Gingerbread House Pattern (it’s a pdf you can print out). This version makes several (3-4) houses about 6″ tall with decorations, depending on factors like how thin you roll the dough and if you trim the cookie pieces after baking them.
After all our early attempts had roofs that aways slid off we realized the icing is actually the most important part to the puzzle. You’ll need to get meringue powder – the rest is pretty simple. You could totally use graham crackers if you wanted to and skip the baking, but you’ve got to have the frosting. We’ve done the graham cracker approach once, though involved using a dremel to carve out crenellations.
For the dough, I also found a recipe for the batter that is easy to remix multiple times – which means less waste – and dries very hard very quickly without requiring very many expensive ingredients. It also smells great, though if you decide to eat it you might want to put it in a ziplock bag with a few apple slices to try to soften it up a bit (it works!). Otherwise the tendency to be rock-hard is very advantageous for “sugar architects” as some of our frequent guests at these events like to style themselves.
Gingerbread Dough:
- 5 cups all-purpose flour
- 1 teaspoon baking soda
- 1 teaspoon salt
- 1 teaspoon ground nutmeg
- 1 teaspoon ground cinnamon
- 1 tablespoon ground ginger
- 1 cup white sugar
- 1 cup molasses
- 1 cup shortening
You’re not reading that wrong – there’s no liquid in this recipe except for the molasses. But you do liquify the shortening by mixing this up on the stovetop. Add a bit more shortening if you see the dough get very crumbly, but microwaving the dough with a small sprinkling of water often does the same trick if it starts to cool down.
 |
 |
 |
 |
Measure flour carefully so you don’t “pack” it in – the dough will be hard to work with if you’ve put in too much flour. Combine flour and other dry ingredients in a large bowl until well mixed. Set aside. Combine sugar and molasses in another container. Set aside. In a large saucepan (a dutch oven works well) melt the shortening over medium heat. Stir in molasses and sugar, then add dry mixture a little at a time until completely mixed. Turn down the heat if you notice it sticking to the bottom of the pan at all.
 It is very easy to roll out this dough while it’s hot, but it’s also sticky while it’s hot. Try not to add flour – it will show up on the pieces since it’s a dark dough. Also, it can be hard to pick up the pieces when they’re soft, so sometimes I just roll it out on the cookie sheet directly, then cut out the shapes and remove the extra dough from the cookie sheet. You do NOT have to grease the sheets. That’s the easiest way to make sure they don’t get stretched out of the right shape.
You can use a sheet of waxed paper over the dough can help keep it from sticking to your rolling pin or hands (if it’s not so hot it will burn you). Aim to get it about 1/4″ thick, thicker for big houses and much thinner (1/8″ is fine) for cookies.
As the dough cools, it will get firmer. To get it soft again, put it in a ziplock bag and microwave it for 20-30 seconds with a small sprinkling of water – I just run my hand under the faucet ad sprinkle and sprinkle it over the dough, then knead it together while it’s hot. You shouldn’t ever have to add any more flour.
 If you make fairly small simple houses this can make about 4 houses. I’m attaching a sample pattern, but you can obviously do whatever you like with the dough. This size makes a house about 5″ tall, depending on how puffy your dough is and how thick you roll it out: Gingerbread House Pattern
I make a pattern out of stiffer paper and lay it on top of the dough, then cut around them using a butter knife. Leave at least an inch between each piece of dough, because it does puff a bit as it bakes. Bake at 375 degrees for 8-15 minutes (how long depends on the size – watch until it gets a little bit darker at the edges and doesn’t look as wet in the center. Bigger pieces might still be a little soft when they come out, so be careful taking them off the sheets.
 If they puffed a lot, you might want to trim a small bit (1/4″-1/2″) off the rounded edges with a sharp knife while it’s warm so they’ll be easier to connect and they’ll all be even. Let them cool completely before you start to assemble them and they’ll get nice and hard.
Royal Frosting Recipe:
- 3 level tablespoons meringue powder
- 4 cups (1 lb.) sifted confectioners’ sugar
- 5-6 tablespoons lukewarm water
Measure the powdered sugar carefully – you want it to look soft but not runny when you first mix the ingredients together. Once everything is mixed, beat it on medium speed in a mixer for 5-10 minutes. It will get very fluffy and shiny. When you can swipe a finger in it and the frosting stays standing up, it’s done.
I use small ziplock bags to spread the frosting – turn the seal area inside out so it isn’t touching the frosting and put a cup or two in the bag at a time. Seal the bag, removing the extra air. Zip the bag, then use a twist-tie or string under the zipper to tie it tightly shut (this keeps the frosting from squeezing out the back as you go. Cut a 1/4″ off the tip of one corner and you’re ready to go!
Assembly:
It takes a little bit for the frosting to dry – at least 10-15 minutes. So I usually have the houses assembled and ready for our guests when they arrive. This has also taken some trial and error – feel free to experiment, but keep in mind the time involved will make this less fun if you have to wait with all that candy sitting out temptingly.
Start by getting a base ready the size you want people to be able to take home. I usually cut a piece of cardboard several inches wider than the “box” of the house and cover it in foil. A heavy paper plate will also work, but if it has ridges it may make it harder to get the icing around the bottom neatly when you’re decorating it.
 |
 |
 |
 |
If the frosting is fairly soft or you’re doing a big house, connect the front, back and sides and let it dry before you add the roof. Small houses can usually be done all at once. If you smoosh the frosting into the corners on the inside (gently) that can help the frosting really take hold. When the house is assembled, let it sit until the frosting dries before you start decorating it.
Not sure where to find the meringue powder? Here’s a link on amazon: http://www.amazon.com/Wilton-oz-Meringue-Powder-Mix/dp/B0001DS5Z8
Here are some samples of what we’ve done over the years (before 2006 I didn’t have a film scanner so the pics are in boxes somewhere):
2006, a Master Craftsman at work:

2006, Witch’s House (at work):

2007, the year of the Dremel:

(the cats chewed off the carefully carved crenellations right away, alas)
2007, Mini Gingerbread Houses:

2007, Gingerbread Gift Box:

2008, friends at work:


2008, Gingerbread Beach House:

2009 – Big House & Smiley House:

2010, Sugar Architects at work:


2010, Gumdrop Piggy:

2011, Frilly Heart House

2011 – with Presents & Christmas Trees:

2012 – the year we brought back castle building? And bought WAY TOO MUCH CANDY. These are the leftovers:

2013 – back to mini houses:
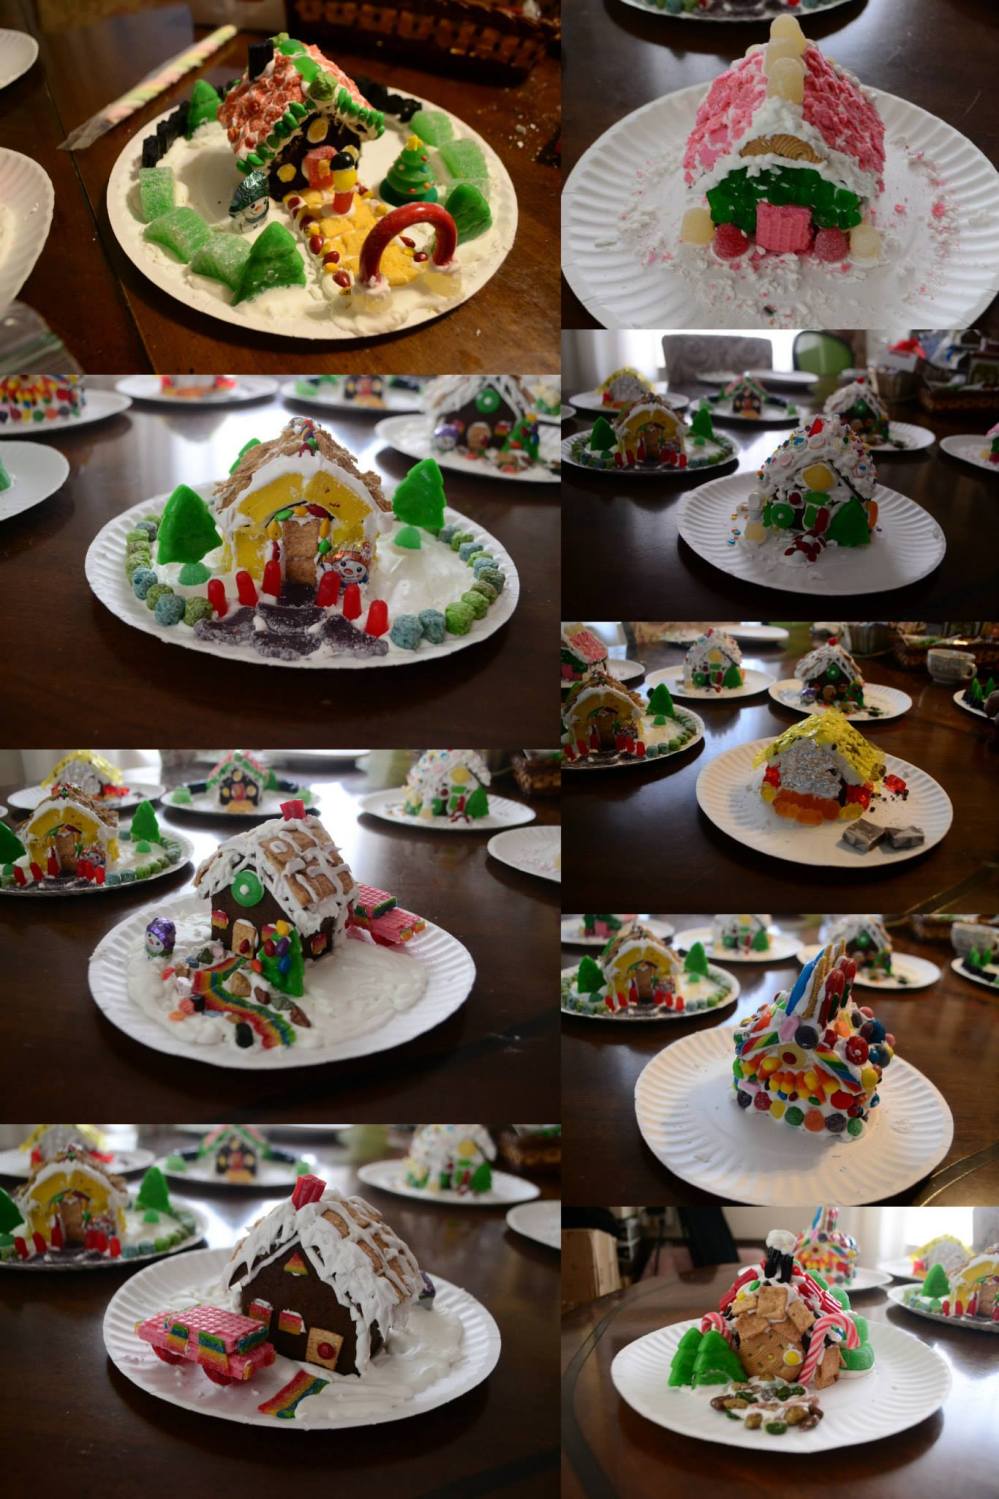
2014: Normal sized, collaborative construction

And MANY more pictures where those came from.


One Comment Add yours